One of the benefits of a NexaX Pro license is the ability to use third party resin. Users can create custom resins for NexaX, and save custom profiles for both third party and native materials.
Please note: with custom settings, it may require some trial and error to find the right settings for the custom resin in use.
Creating Custom Resins
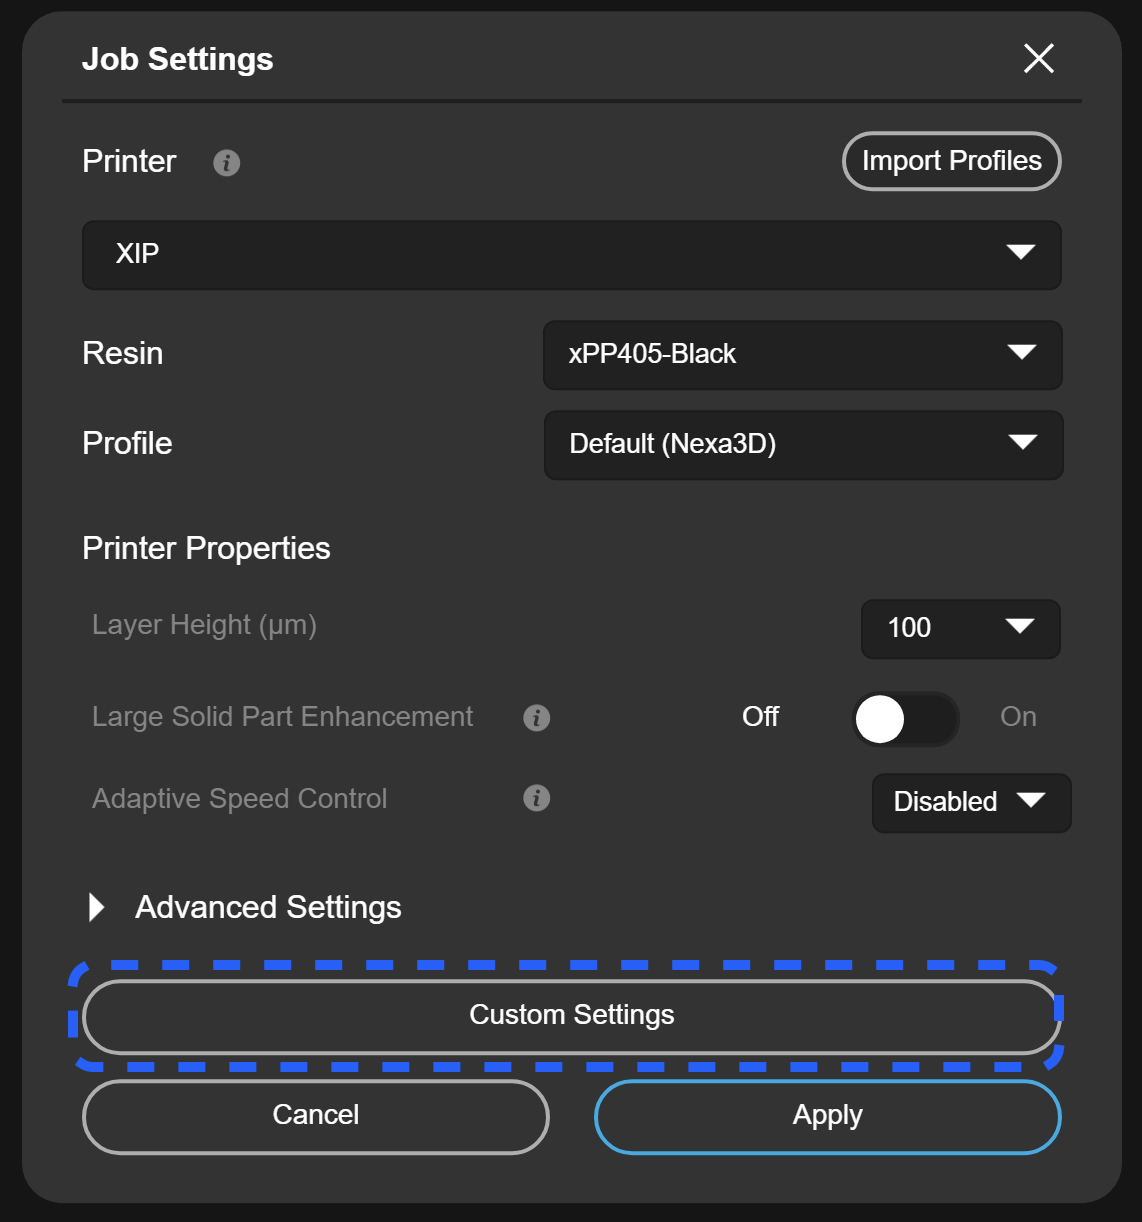
Custom Resins can be created from the Custom Settings menu located at the bottom of the Job Settings dialogue box.
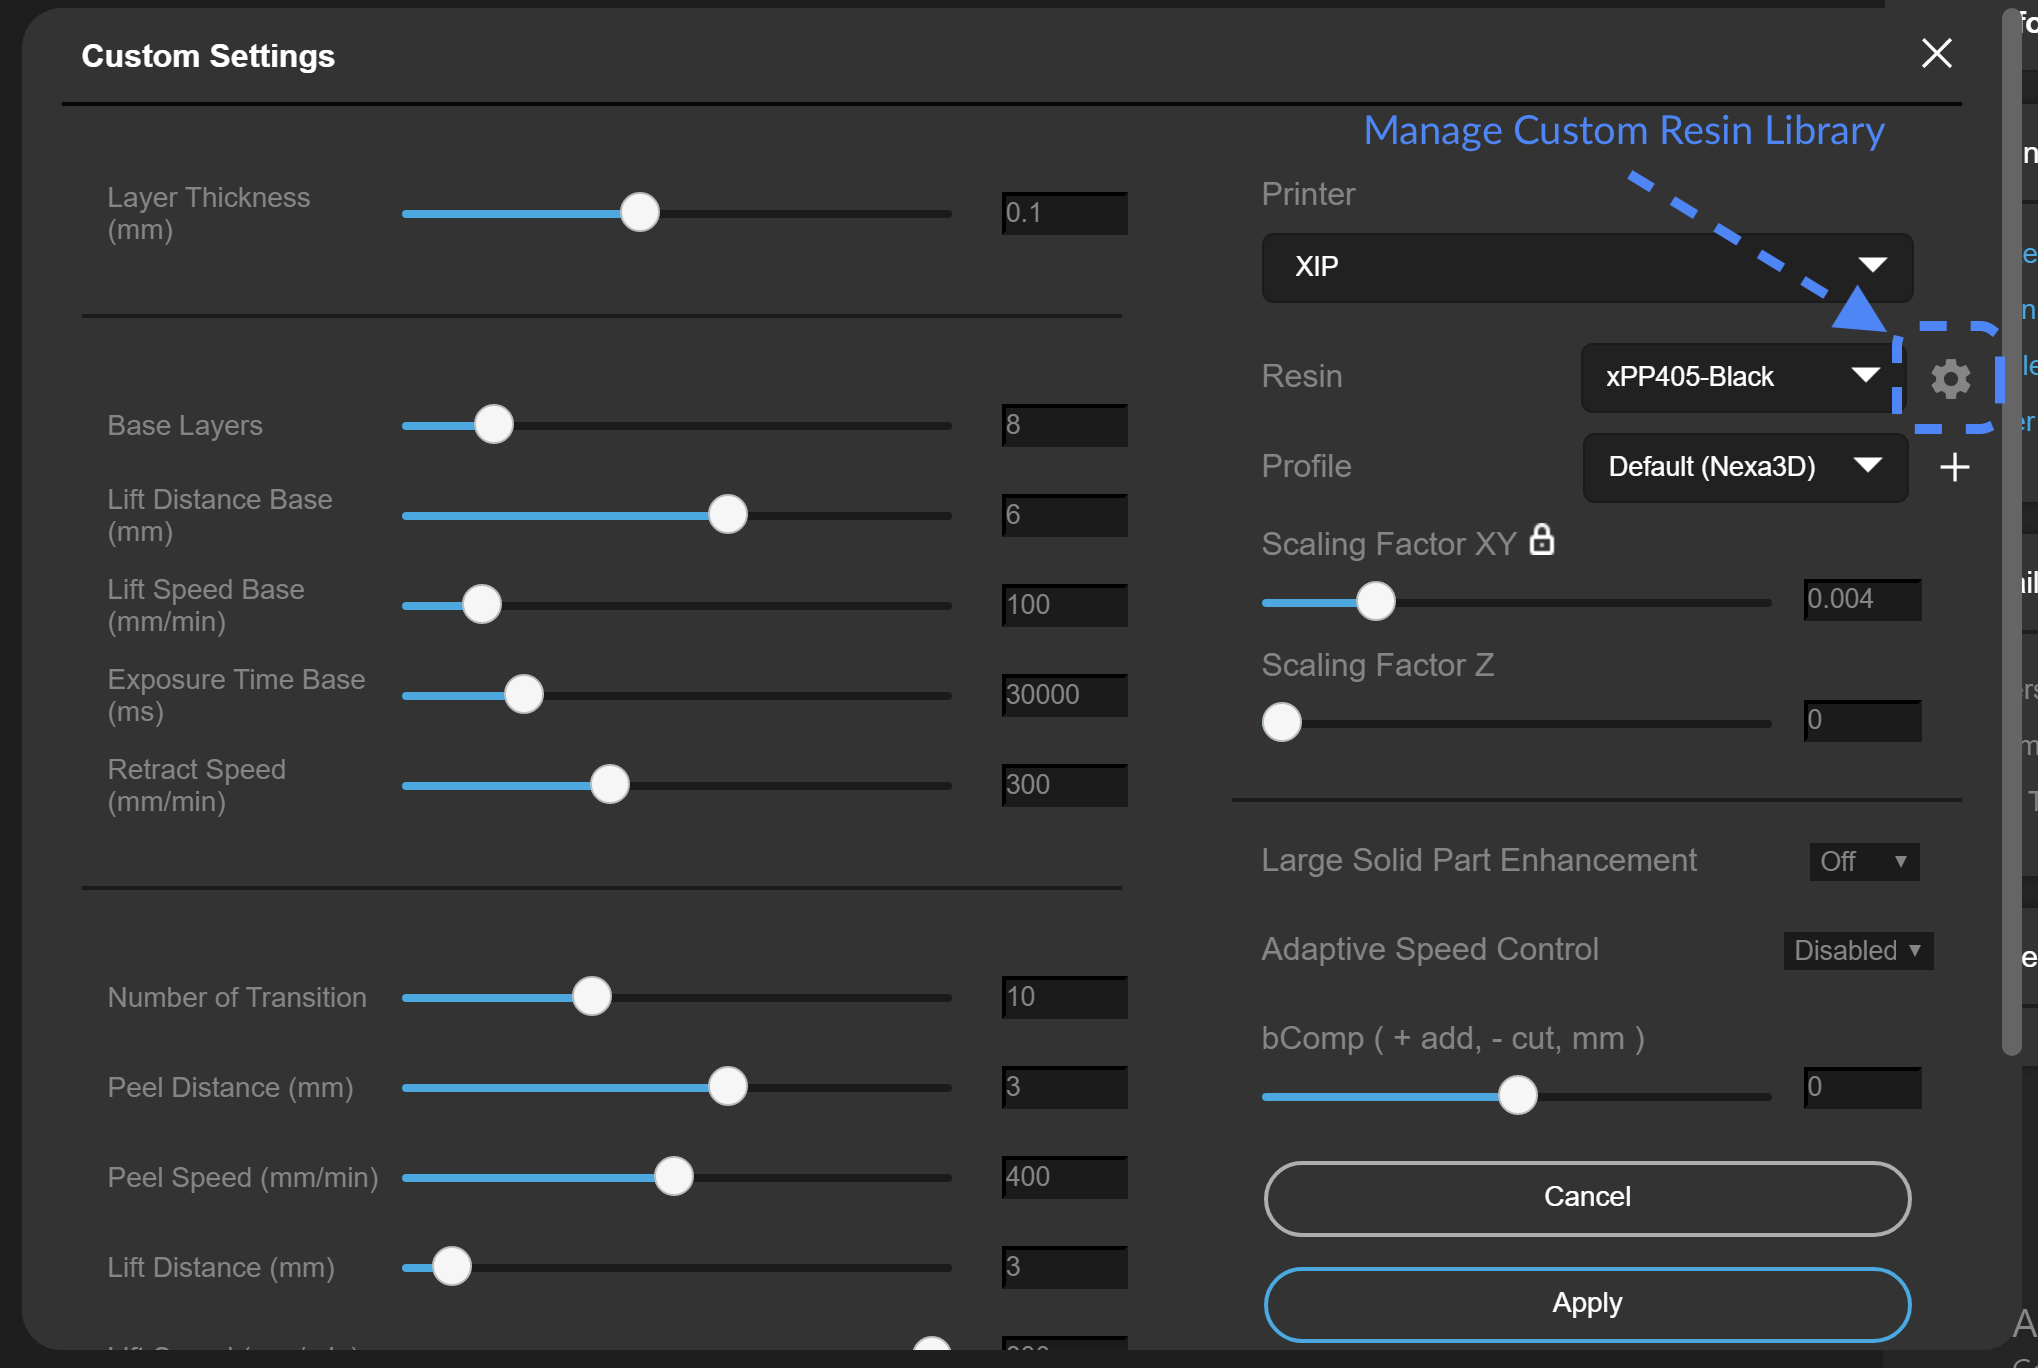
Custom resin settings can be saved and managed through the custom material profile library (with a NexaX Pro for XiP license). To access the library, click the gear icon next to the material dropdown list in the custom settings window.
In the library, each line item can be uncollapsed to see what resin profiles are available for each printer light engine.
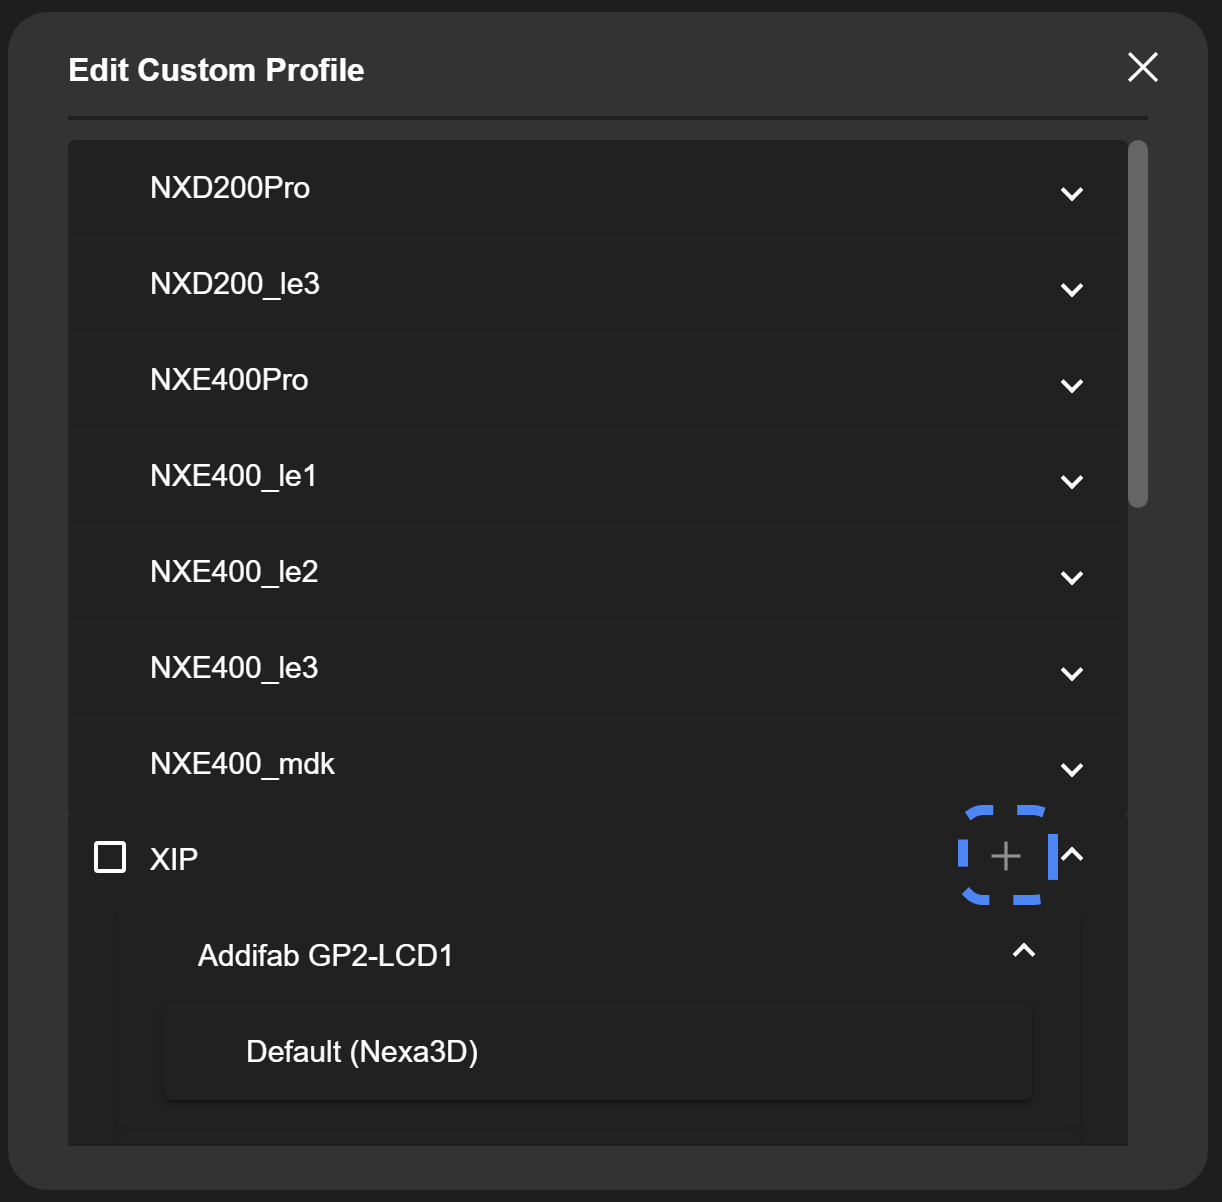
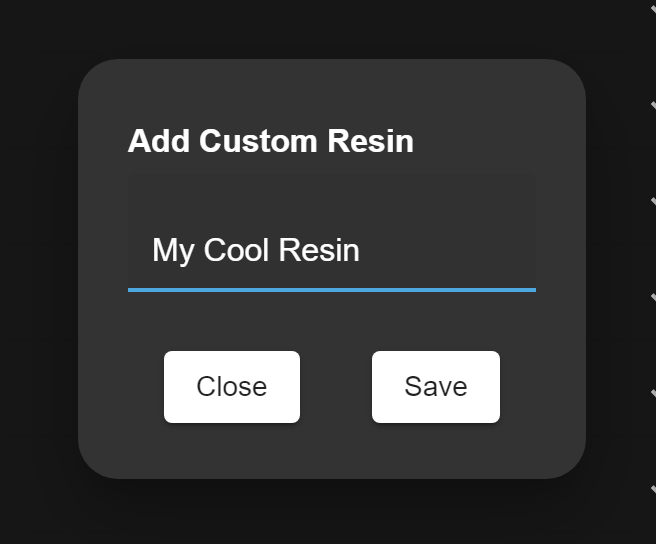
Click the plus button next to the appropriate printer to add a new Custom Resin. A dialogue box will pop up for the user to name the material. Once the Custom Resin is named and saved, it will appear in the list of resin options for the chosen light engine.
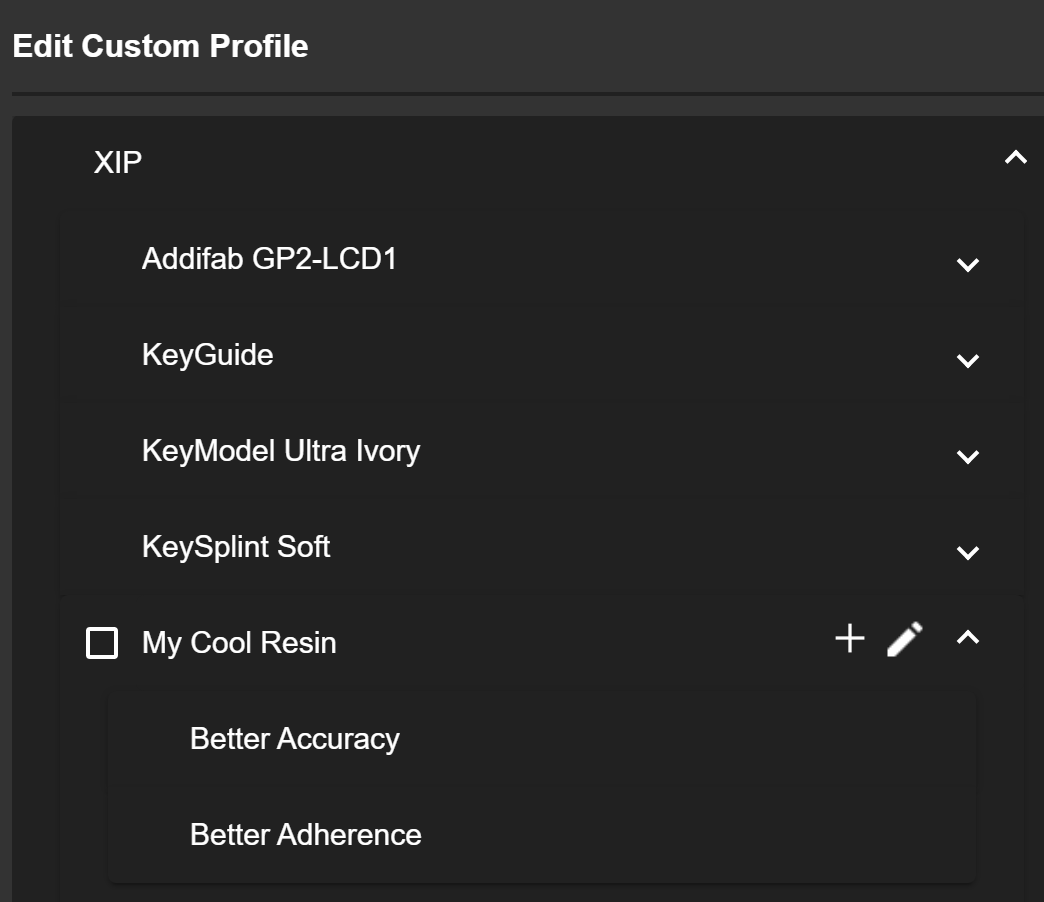
Close the library window (with the X in the top right hand corner of the dialogue box) to return to the custom settings window. The new Custom Resin should appear in the Resin dropdown menu.

Creating Resin Profiles
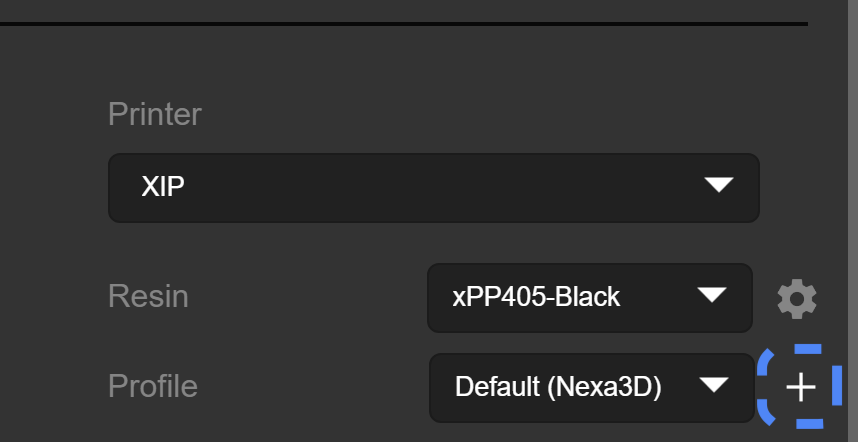
Custom parameter settings can be saved as profiles from the Custom Settings menu. To save a profile, click on the plus button next to the drop down menu labeled "Profile"
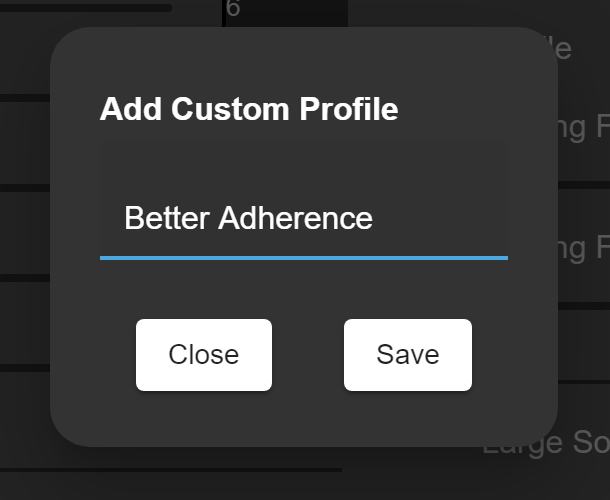
A dialogue box will appear, and the user can name the profile and click save to create it.
Once it is created, make sure that it is selected from the Profiles drop down and make the changes to the settings using the sliders and text boxes.
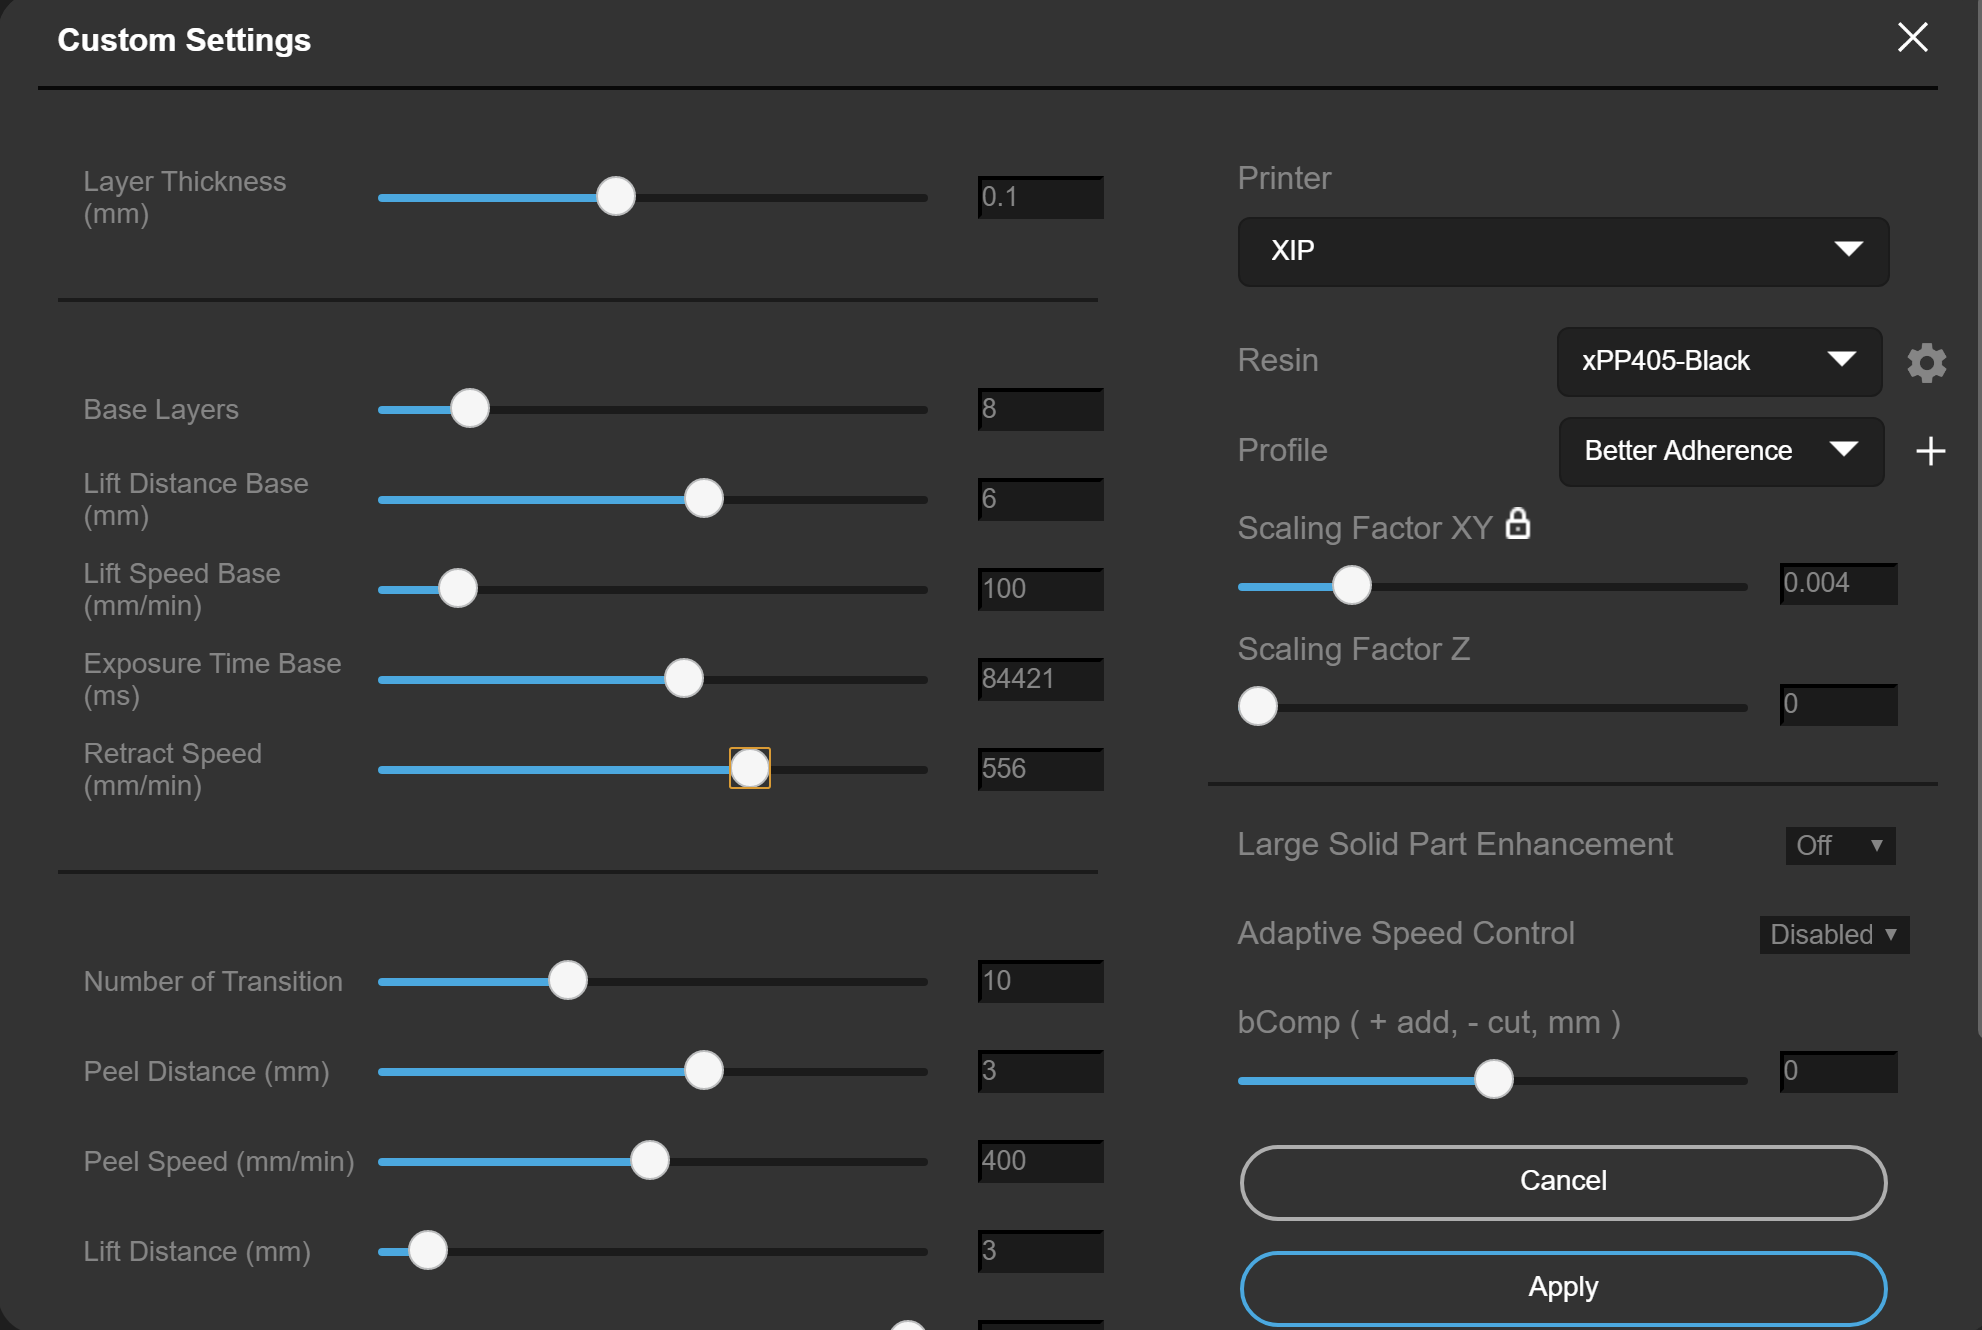
When ready to save, click the apply button and a dialogue will appear that allows the user to update the name and save.
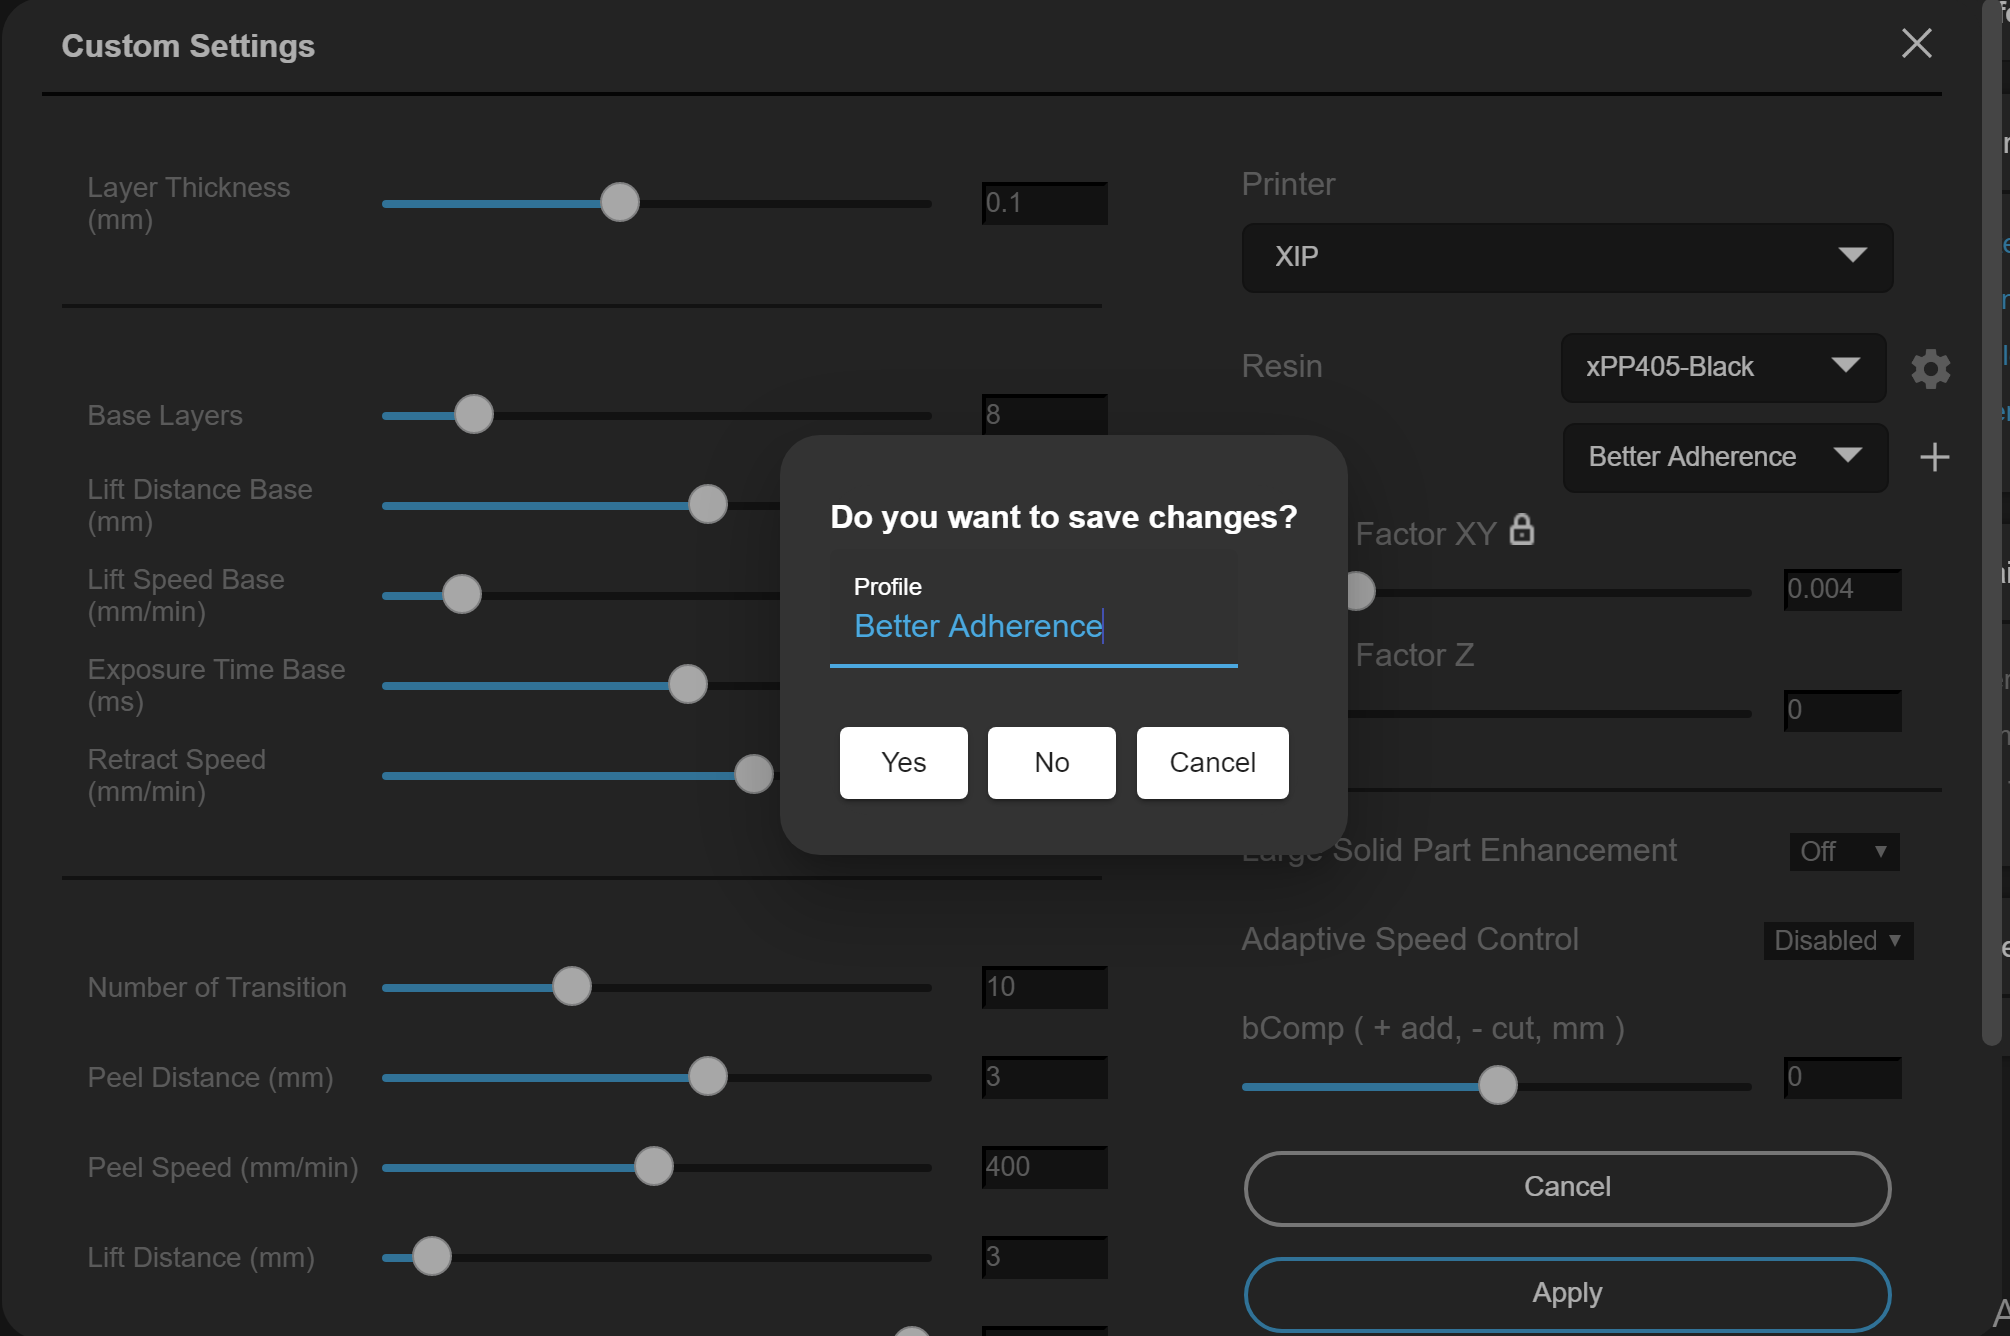
Click Yes to save the changes and close the Custom Settings menu, No to discard the changes and close the Custom Settings Menu, or Cancel to go back to the Custom Settings menu to make more changes.
Updated
Comments
0 comments
Article is closed for comments.